Creating a Zafiro Robot
Prerequisites for Creating a Zafiro Robot
The following list of requisites is necessary to be able to start the Zafiro Robot connection process in BotReady.
- Technical user group, authorized to manage and administrate Robots.
Administration – New Robot
To begin connecting a Robot, click on the New Robot button on the Bot Console page.
 The screen to configure it, which has different tabs, is shown below.
1. Robot Data
In this tab, you will configure the Zafiro robot data:
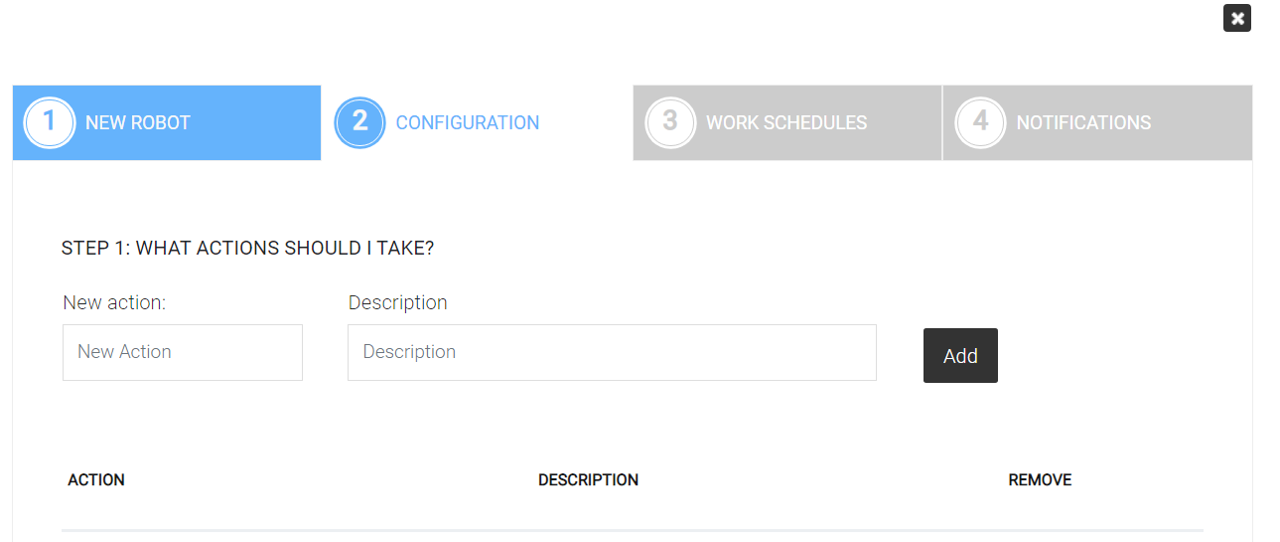
| Field | Description |
|---|---|
| SELECT NEW ROBOT | Possible options: Zafiro, Blue Prism, Power Automate, UiPAth, Automation Anywhere, SQLServer Stored Procedure, UFT, WWW Alive, Web Service. |
| ROBOT NAME | Enter the name with which the Robot will be recognized. |
| GROUP | Select from a drop-down list the Group to which the Robot will belong. |
| ROBOT DESCRIPTION | Enter a short description of the Robot being connected. For example: Purchase Order Invoice Generator. |
| OPERATION TIME IN MINUTES | Enter how long (in minutes) it takes a person to execute a transaction of the operation the Robot is automating. |
| OPERATION NAME | Enter a description of the operation the Robot is executing. For example: Generation of a Purchase Order Invoice. |
| OPERATION NAME (PLURAL) | Enter a plural description of the operation the Robot is executing. For example: Generation of Purchase Order Invoices. |
2. Configuration
Configuration - Step 1
In this tab, you will view the 4 configuration steps.
- Step 1: WHAT ACTIONS SHOULD I TAKE?
It allows registering the actions the Robot will take when executed; these actions will be related to the Robot's execution criteria.
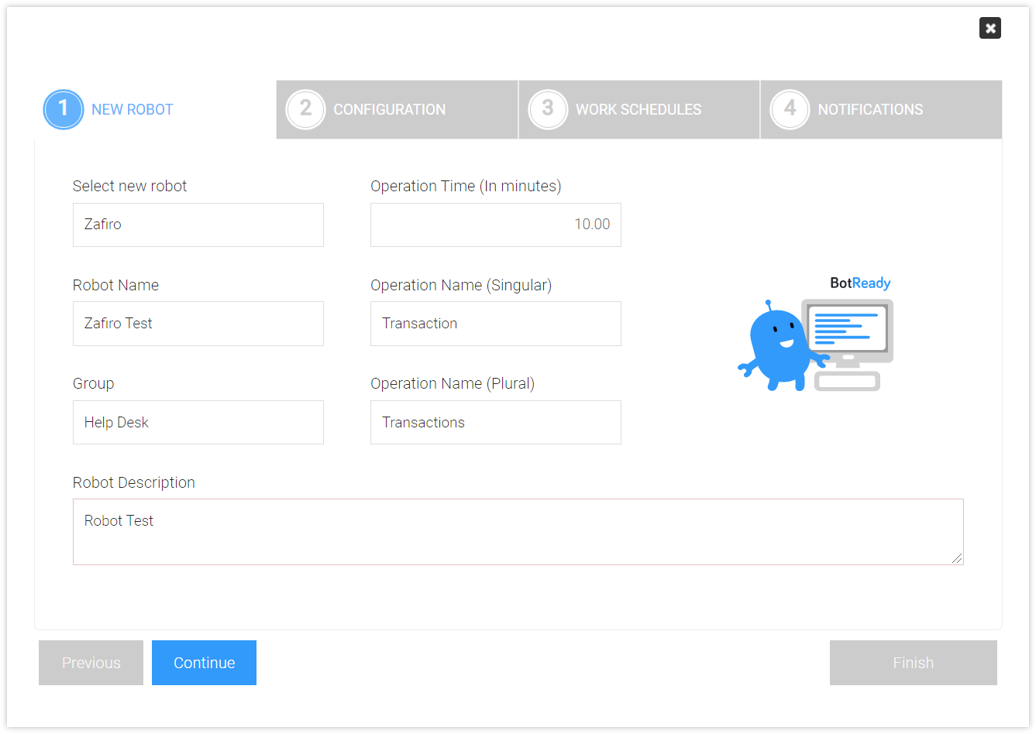
Available Fields
| Field | Description |
|---|---|
| New Action | Name of the action to be executed by the robot when processing. |
| Description | Description of the action to be executed by the robot when processing. |
Available Actions
- Add Button: It adds the new action to the Robot's list of actions.
 It deletes an existing action.
Configuration - Step 2
- Step 2: GIVE ME WORK
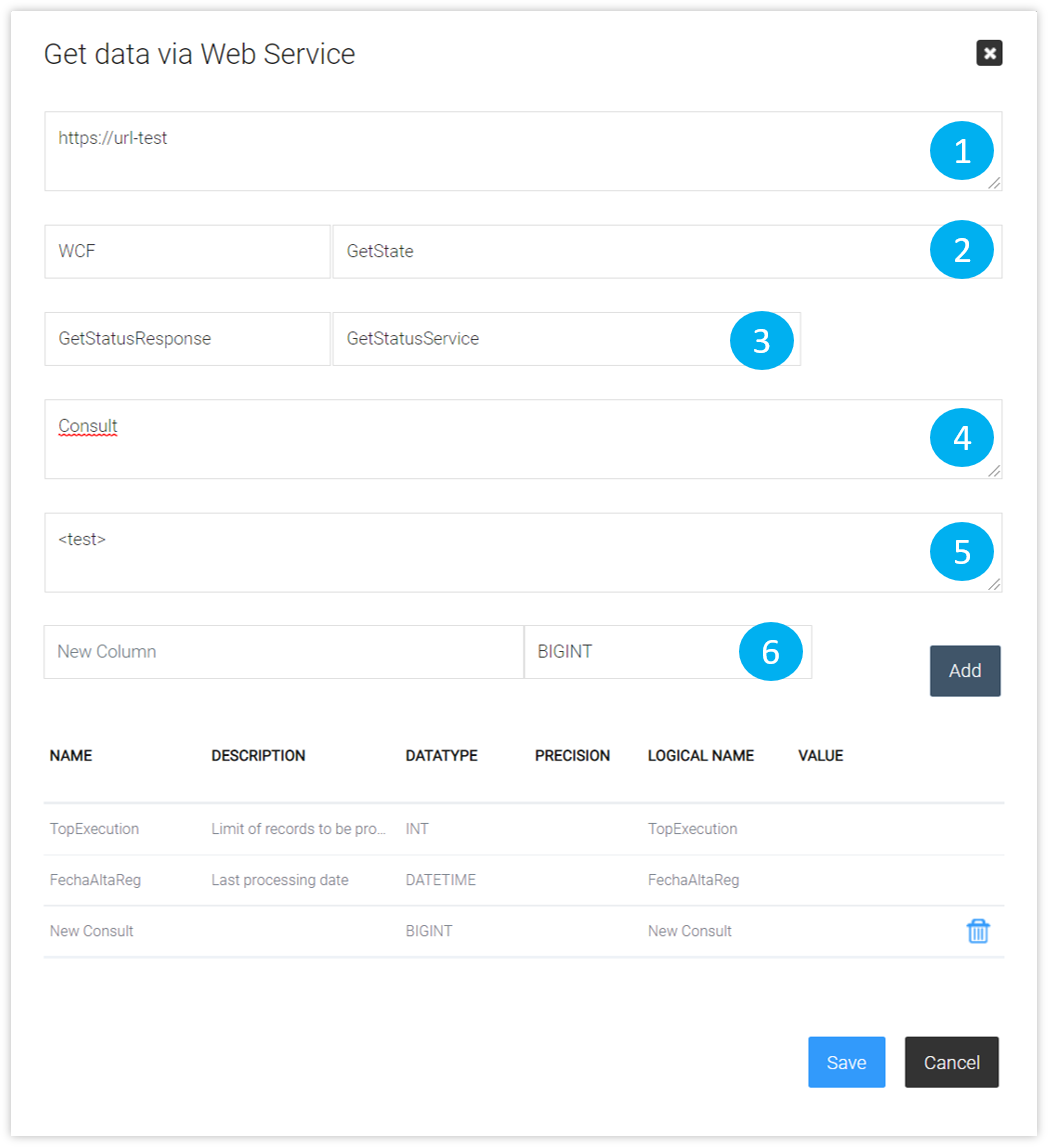
It allows identifying the origin of the information to be analyzed. It may be a web service or a database stored procedure.

- Get From: It allows selecting where to obtain the information based on which to conduct an analysis, apply a criterion and execute actions.
Available Options
| GET FROM | Description |
|---|---|
| Omit | It omits the option. |
| Web Service | It enables the option to configure and parameterize the Web Service to be executed. (See subsection: Web Service Configuration) |
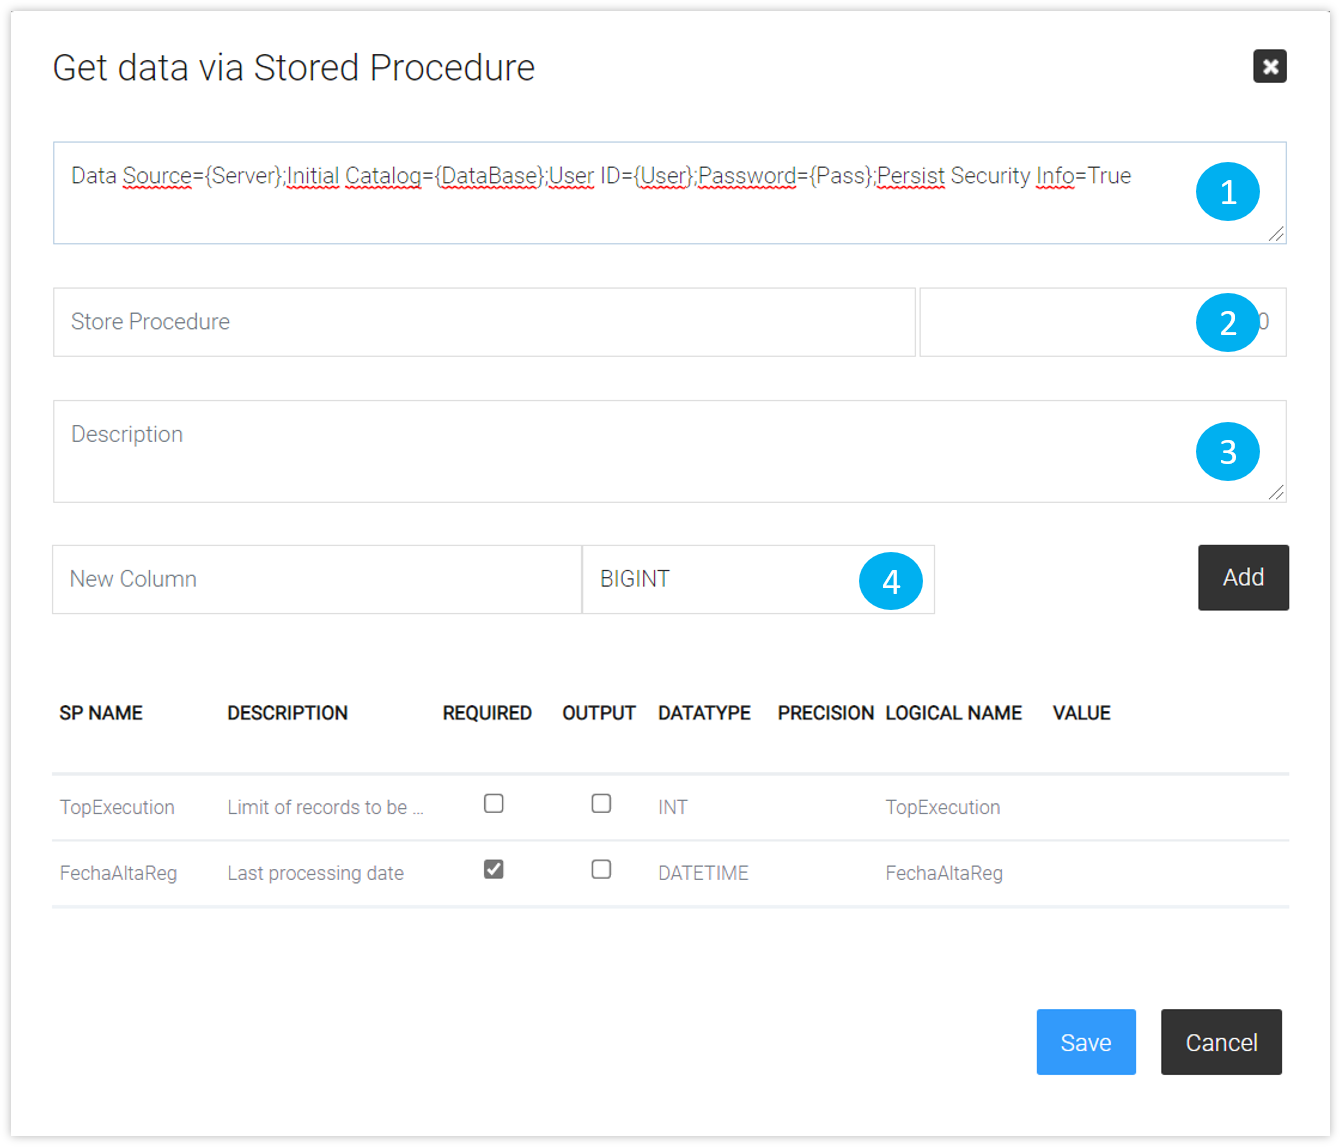
| Stored Procedure | It enables the option to configure and parameterize the Stored Procedure to be executed. (See subsection: Stored Procedure Configuration) |
Web Service Configuration.
Stored Procedure Configuration.
Configuration - Step 3
- Step 3: EXPLAIN TO ME HOW TO PROCESS THE WORK
In this tab, you must enter the different analysis criteria, from the information retrieved in the previous step.
Based on these criteria, the robot reduces the information of origin only to the information of interest and determines the action to be applied in the following step.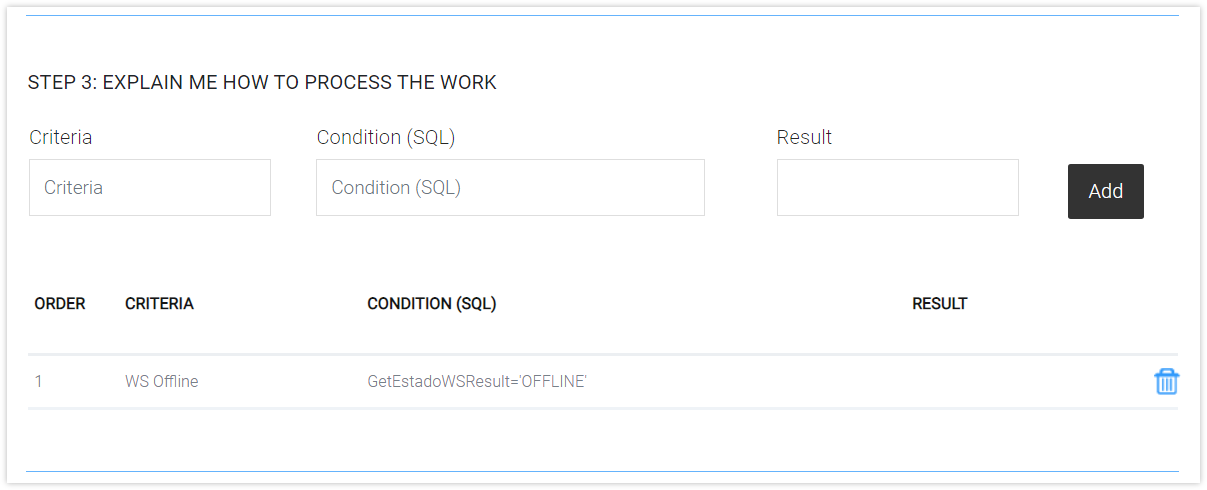 The SQL conditions are created by assessing the fields retrieved in step No. 2. For example, if in step No. 2, a list of invoices is retrieved through the following fields: InvoiceType and TotalAmount. The condition: “Invoices of more than ten thousand pesos” would be written as follows: InvoiceType = ‘A’ and TotalAmount > 10000
Configuration – Step 4
- Step 4: EXPLAIN TO ME HOW TO PERFORM THE ACTIONS
In this tab, you must enter the information necessary to process the result of the analysis from the previous step.
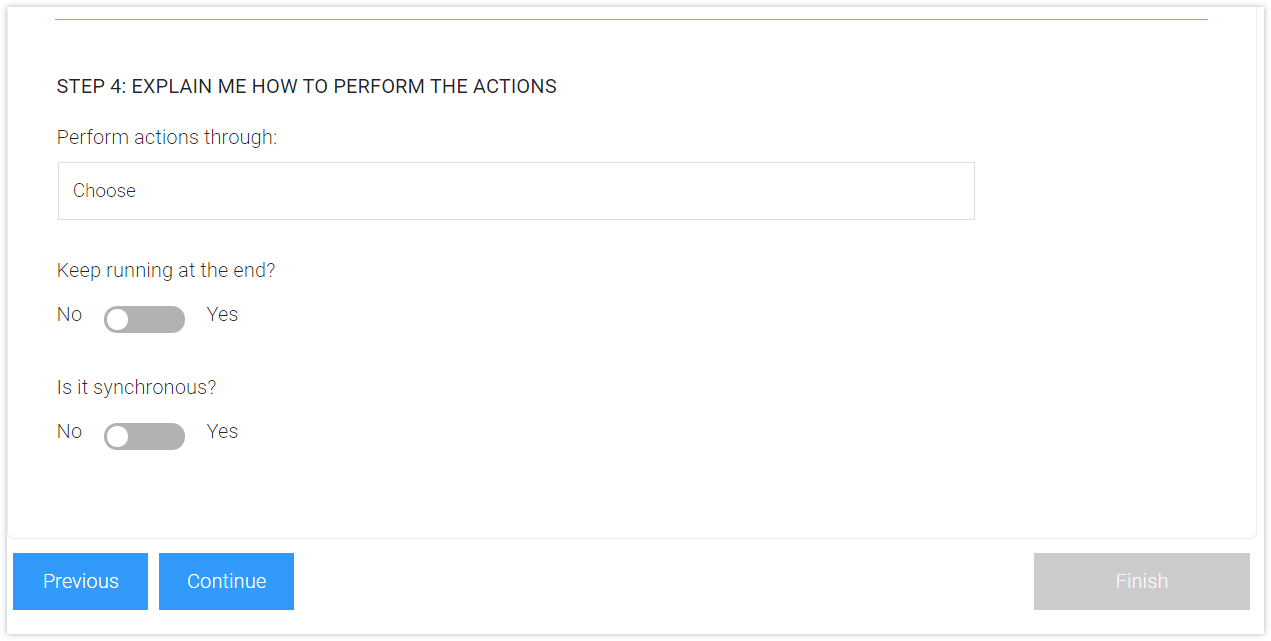
- Perform actions through: In this field, you may choose one of the following options:
- Notification. (See subsection "Perform actions through: Notification")
- Windows Command. (See subsection "Perform actions through: Windows Command")
- Stored Procedure. (See subsection "Perform actions through: Stored Procedure")
- Web Service. (See subsection "Perform actions through: Web Service")
- Keep running at the end: The robot remains active after finishing the execution. You may see the execution in green from BotReady's portal. This option is used to indicate start signals from robots of other technologies.
- It is synchronous: The agent cannot start this robot or any other robot until the execution of the previous synchronous one is finished.
Perform actions through: Notification
If you choose Actions to be performed through a Notification, the following screen appears:
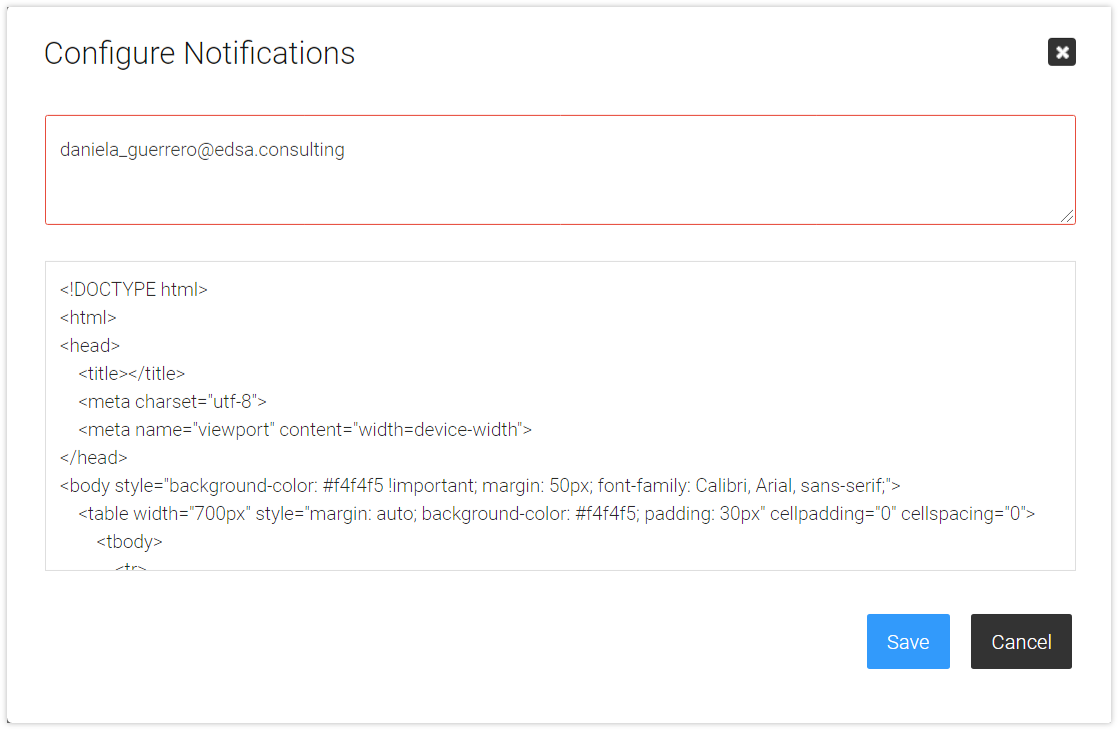 In this tab, you must enter the email recipients (separated by a semicolon) and the content of the mail to be sent as a notification. BotReady establishes by default a content that is made up of the information from step 2 presented in a tabular format, which can be used without changes.
Perform actions through: Windows Command
If you choose Actions to be performed through a Windows Command, the following screen appears:
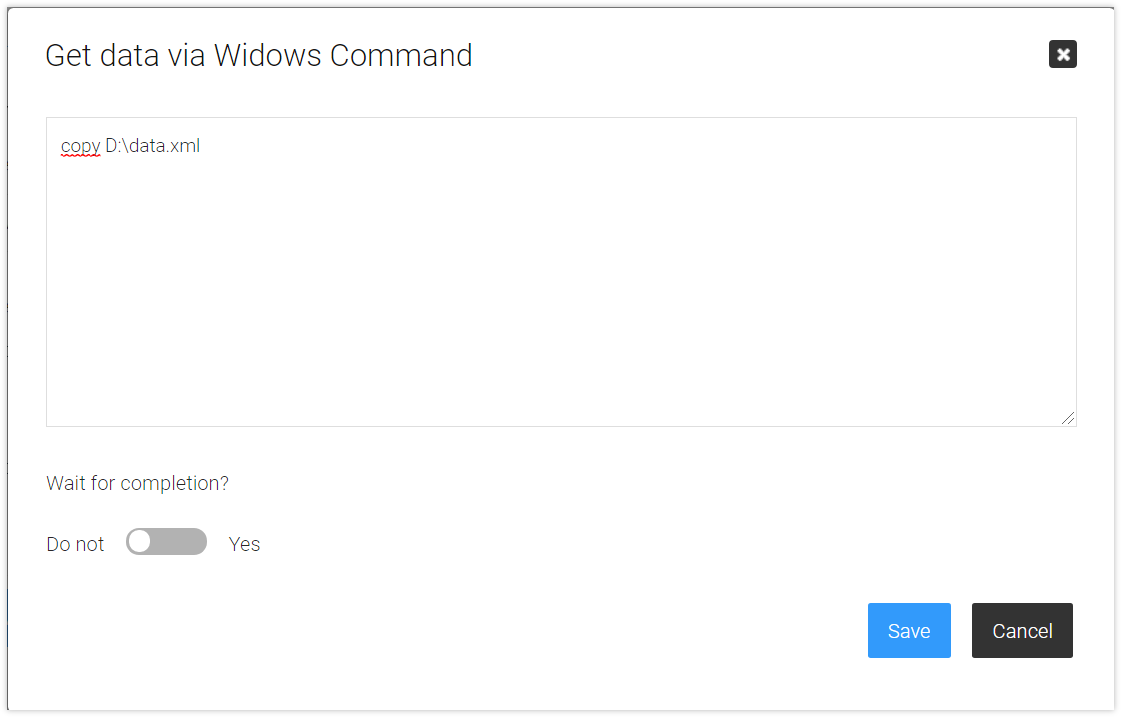 In this tab, you must enter the Windows command line to be executed.
Additional Configurations
Wait for completion?
- YES: The robot gets blocked until the command is fully executed.
- DO NOT: The robot starts the command and considers the execution to be completed without awaiting the result of the command.
Perform actions through: Stored Procedure
If you choose Actions to be performed through a Stored Procedure, the following screen appears:
The configuration of the stored procedure is similar to step 2.
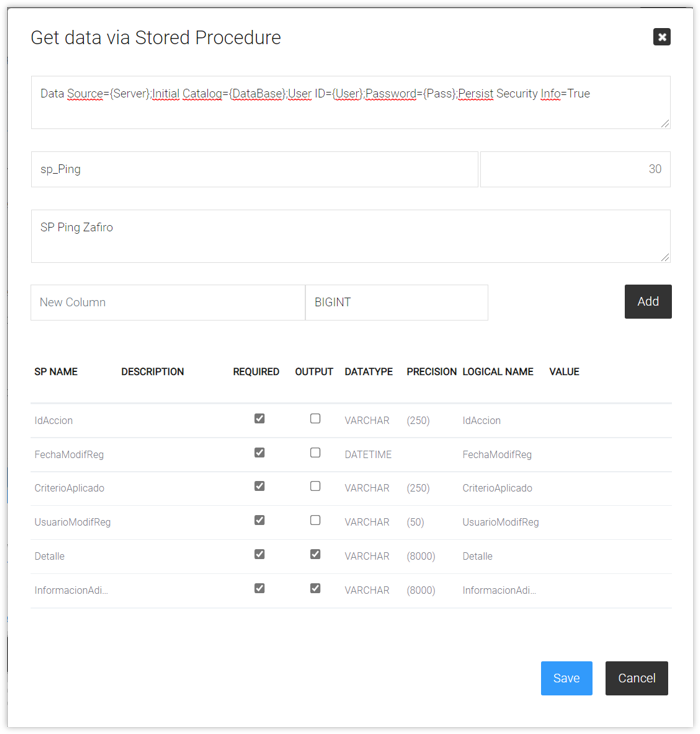
Note: Any data obtained in step 1 can be defined and incorporated as input parameters into the Stored Procedure; but it must be defined with the same name as the output parameter of step 1.
Perform actions through: Web Service
The configuration of the web services is similar to step 2.
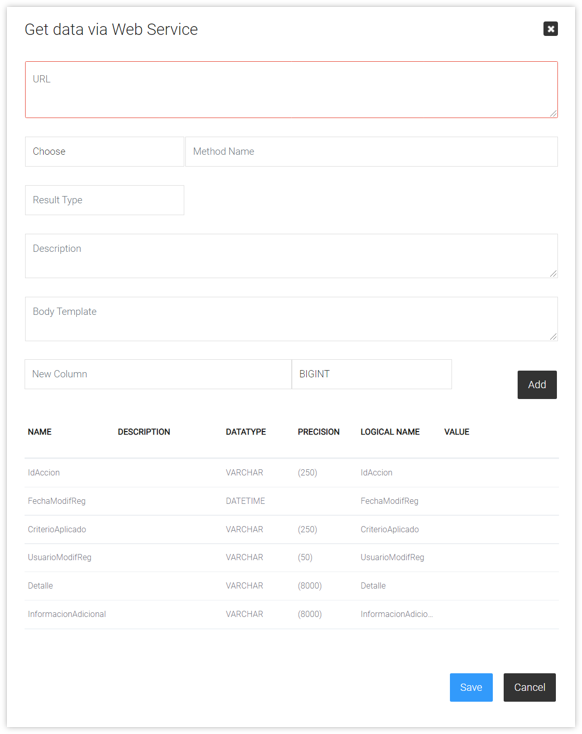
Note: Any data obtained in step 1 can be defined and incorporated as input parameters into the Web Service; but is must be defined with the same name as the output parameter of step 1.
3. Work Schedules
In this tab, you must configure the Robot's execution schedules and behavior.
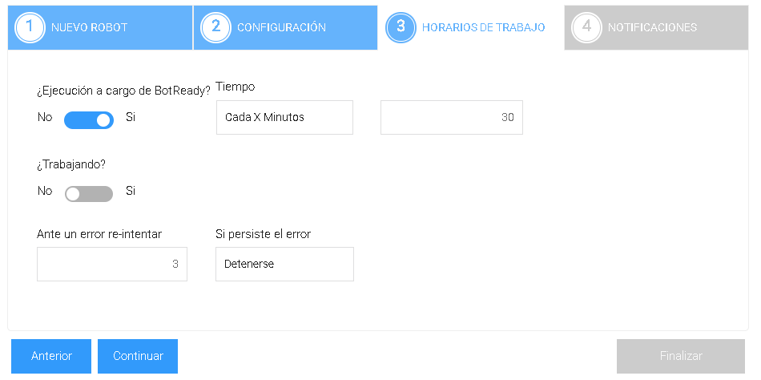
| Field | Description | Possible Options |
|---|---|---|
| SCHEDULED BY BOTREADY? | It allows you to configure if BotReady is in charge of the execution. | YES/NO |
| WORKING? | It allows you to select whether or not the Robot will be active and working. | YES/NO |
| TIMING | It allows you to select the type of work schedule for the Robot. (See Note) | Every X Minutes/Customized/All the Time |
| RETRIES WHEN ERROR | It allows you to enter the number of times the Robot will re-attempt to process the operation when it finds an error. | Free value |
| IF THE EXECUTION ERROR PERSISTS | It allows you to select the action to be taken if the error persists after exceeding the established number of attempts. | Stop/Continue working |
Note: You can find more information on how to configure the Robot's Work Schedules in Section: Administrator Guide - Robot Execution Schedule
4. Notifications
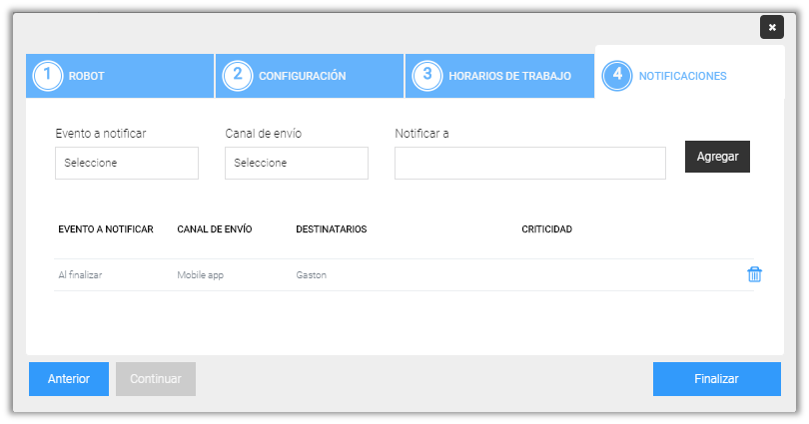
In this tab, you can configure the notifications the Robot will send in each event and how it will perform the notification (through a contact channel).
| Field | Description |
|---|---|
| EVENT TO NOTIFY | Select which event will be notified by the Robot. Possible Options: When executing an error transaction, When executing a successful transaction, At the end, At the beginning, When an unexpected error occurs, When a robot does not finish the transaction after more than X minutes have passed, When a robot does not finish/is not executing the transaction after more than X minutes have passed. |
| COMMUNICATION CHANNEL | Select the channel to be used to send the notification to the user. Available options: Dashboard/Email/Mobile App. (See subsection Communication Channel) |
| NOTIFY TO | Select which user the Robot will notify. Available options: Mail/User, Robot Owner User, Robot Executor User. (See subsection Communication Channel) |
4.1 Communication Channel
This feature allows you to configure how the Robot's notifications will be sent. The possible options are detailed below:
4.1.1 Dashboard
When you choose this option, the event notification will be shown on the “Notifications Panel”.
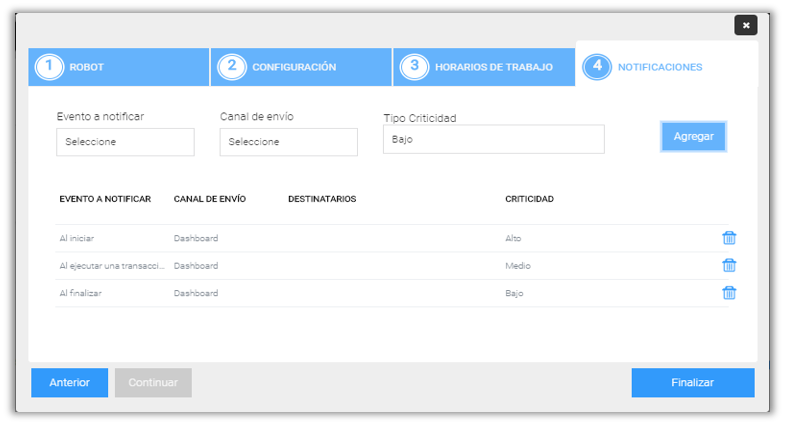
When “Dashboard” notifications are configured, they may have 3 criticality levels (Low, Medium, High).
When a notification of that criticality is generated, it will be grouped under the corresponding level in the Notifications Panel.
Type of Criticality
Select the Criticality Level of the notification.
The available options are:
 Low: the notification will be displayed under the KPI in Yellow on the Panel.
 Medium: the notification will be displayed under the KPI in Orange on the Panel.
 High: the notification will be displayed under the KPI in Red on the Panel.
Note: You can find more information about the Notifications Panel in Section: User Guide - Notifications Panel
4.1.2 Email
The notification of the event will be sent by email to the configured accounts.
Upon choosing this option, the Notify To field is enabled, with the following available options to choose from:
- Mail: in the field located to the right of “Notify To”, you may write the email address of only one recipient, or the email addresses of several recipients, using “;” as an address separator.
- Robot Owner User.
- Robot Executor User.

4.1.3 Mobile APP
The notification of the event will be a PUSH type notification in the Mobile App.
- Upon choosing this option, the Notify To field is enabled, with the following available options to choose from:
- User: in the field located to the right of “Notify To”, you must write the User Name (System or Domain user) that will receive them.
- Robot Owner User.
- Robot Executor User.

Available Actions
Add Notification
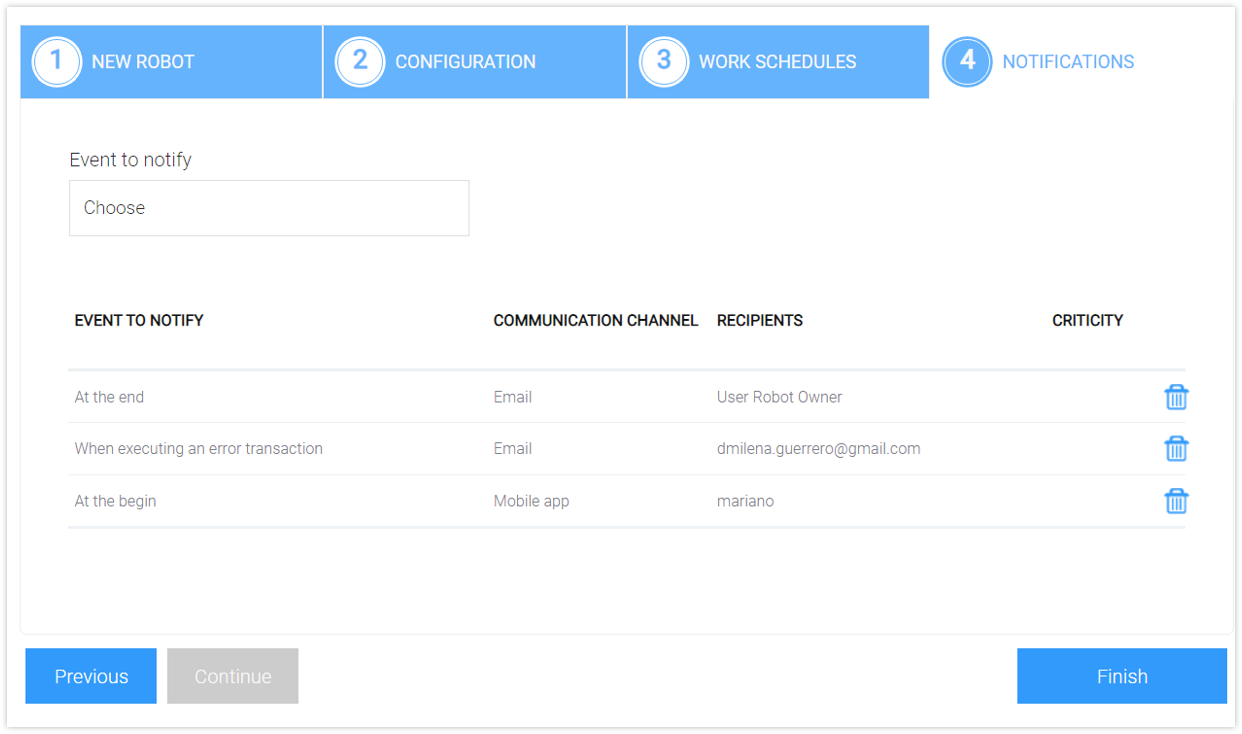
For every new event to be notified (with its corresponding communication channel), you must click on the Add button.
Delete Notification
You may delete all the notifications by clicking on the button.
Finish Connection
The last step to successfully finish the creation and configuration of the Robot is to click on the Finish button on Tab 4: Notifications.
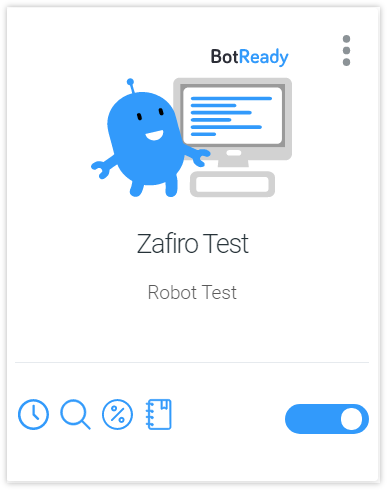
On the Robot Administration page, the new Robot will appear as follows:
